Indulge Easily: The Ultimate No-Churn Peanut Butter Oreo Ice Cream
Imagine a dessert that combines the irresistible crunch of Oreos, the rich, savory sweetness of peanut butter, and the creamy dreaminess of homemade ice cream – all without an ice cream maker. Too good to be true? Not with the magic of **no churn peanut butter Oreo ice cream**. This isn't just a recipe; it's a revelation for anyone who loves decadent treats but values simplicity and ease. Forget complex preparations, tempering eggs, or hauling out bulky kitchen appliances. This masterpiece comes together with just a handful of ingredients and a few minutes of active prep time, promising a luxurious experience that tastes far more elaborate than it actually is.
For many of us, the idea of homemade ice cream conjures images of dedicated machines and lengthy processes. But what if we told you that the secret to incredibly creamy, rich ice cream lies in a clever combination of just two primary ingredients, augmented by your favorite mix-ins? This innovative approach not only saves time and effort but also opens up a world of flavor possibilities, starting with the universally beloved duo of peanut butter and Oreos. Whether you're a seasoned baker looking for a quick fix or a complete novice eager to impress, this no-churn method is your ticket to frozen dessert heaven.
The Magic Behind No-Churn: Simplicity Meets Indulgence
The genius of no-churn ice cream lies in its ingenious use of two fundamental components: heavy whipping cream and sweetened condensed milk. When these two powerhouses unite, they create a base that mimics the texture and richness of traditionally churned ice cream, but with none of the fuss. Here’s a quick breakdown of how this culinary alchemy works:
* **Heavy Whipping Cream:** When whipped, heavy cream incorporates air, transforming into a light, airy foam. This trapped air is crucial for preventing the formation of large ice crystals during freezing, which is what often makes homemade ice cream icy rather than creamy. The fat content in the cream also contributes to the luxurious mouthfeel.
* **Sweetened Condensed Milk:** This thick, sweet liquid serves multiple purposes. It provides the necessary sugar content, which not only sweetens the ice cream but also acts as an anti-freeze, lowering the freezing point of the mixture. This results in a softer, scoopable texture even when frozen solid. Its condensed nature also adds body and a delightful richness that regular milk or sugar water simply cannot replicate.
Together, these ingredients form a stable, emulsified base that, once frozen, delivers that coveted smooth, creamy consistency without the constant agitation of an ice cream churner. It's a game-changer for busy parents, spontaneous entertainers, or anyone who simply appreciates an effortless path to an extraordinary dessert. Imagine finding yourself with a carton of heavy cream nearing its expiration date – instead of letting it go to waste, you can whip up a batch of this fantastic **no churn peanut butter Oreo ice cream** in minutes, turning potential food waste into a delicious triumph.
Crafting Your Ultimate Peanut Butter Oreo Ice Cream: The Core Recipe
While the concept of no-churn is elegantly simple, the specific combination of peanut butter and Oreos elevates this dessert to legendary status. This particular flavor profile is a testament to the fact that some pairings are just meant to be. The salty-sweet allure of peanut butter perfectly balances the deep chocolate and vanilla creaminess of Oreos, creating a symphony of textures and tastes in every bite.
Here's a conceptual overview of how this delightful treat comes to life:
1. **Whip the Cream:** Start by whipping cold heavy cream until it forms stiff peaks. This creates the airy volume necessary for a light texture.
2. **Fold in Condensed Milk:** Gently fold in the sweetened condensed milk. The key here is "gently" – you want to combine them without deflating all the air you've carefully incorporated into the cream.
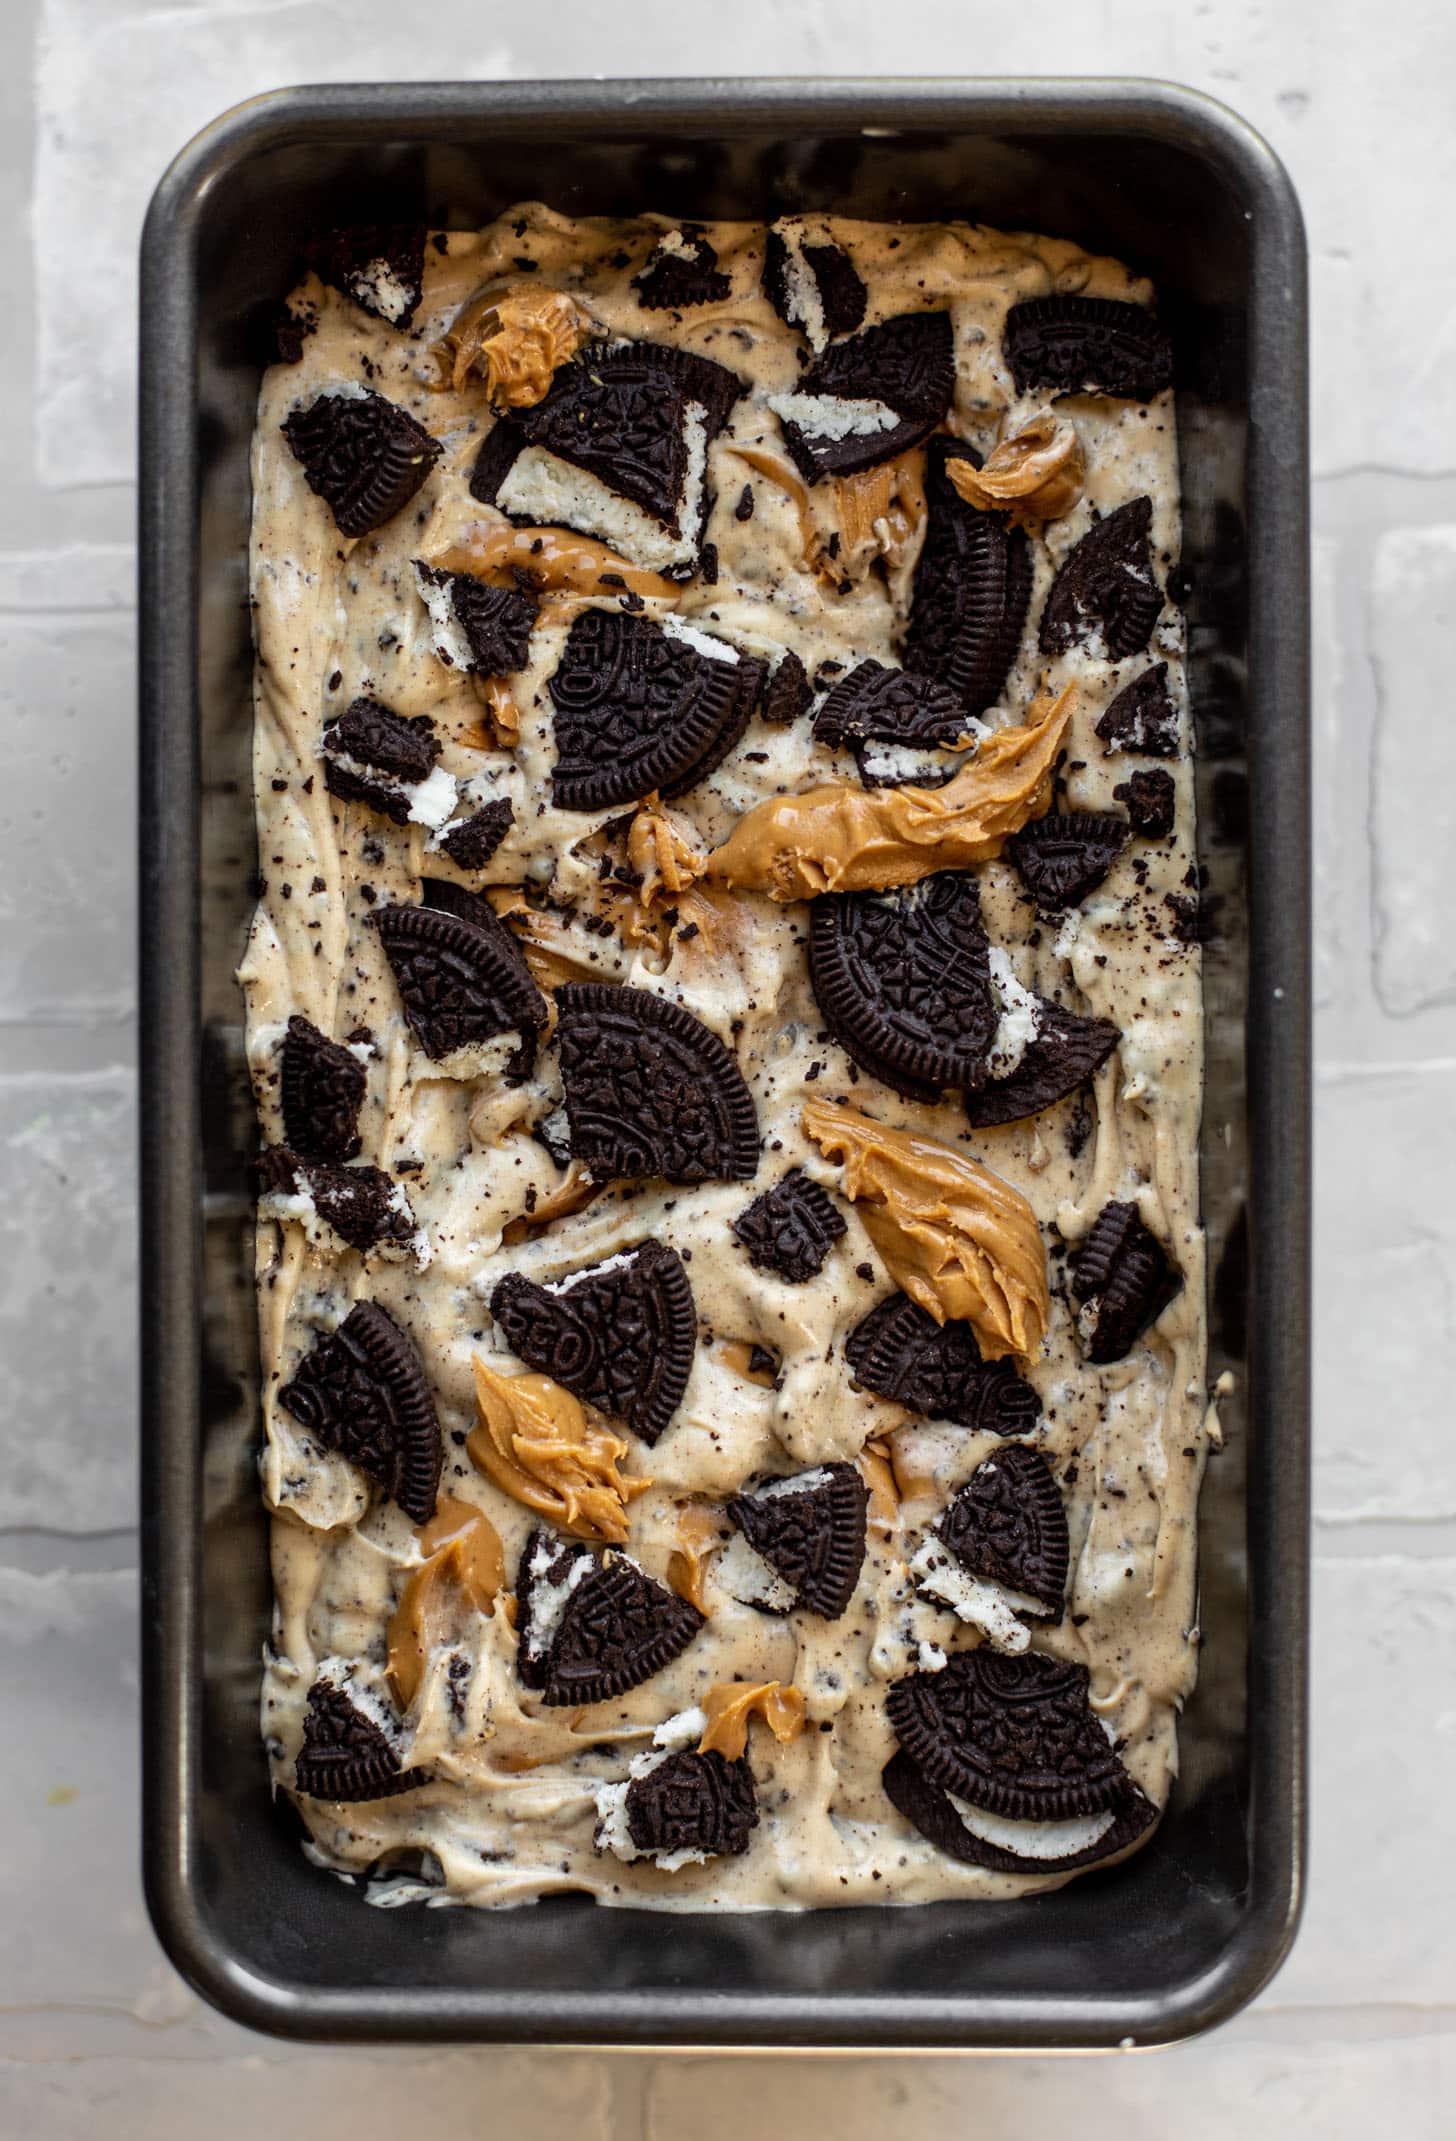
3. **Introduce Peanut Butter:** Swirl in generous dollops of creamy peanut butter. You can melt it slightly for easier swirling or add it as soft dollops for more distinct ribbons of flavor. For a truly authentic experience, don't shy away from incorporating a mix of smooth and crunchy peanut butter for added texture.
4. **Crush and Conquer with Oreos:** Add a hearty amount of coarsely crushed Oreo cookies. Some people prefer finely crushed bits for even distribution, while others love large chunks for dramatic textural contrast. Don't be afraid to experiment to find your ideal crunch level.
The beauty of this process is its flexibility. Want more peanut butter? Go for it! Craving extra Oreos? Pile them in! This is your dessert, and the reins are entirely in your hands. For a more detailed breakdown of the exact ratios and steps, including specific ingredient quantities to get you started on your journey to homemade ice cream bliss, explore resources like our
Ingredient No-Churn Peanut Butter Oreo Ice Cream: Easy Recipe. It's designed to guide you through every pour, whip, and fold, ensuring your first (or fiftieth!) batch is a resounding success.
Beyond the Basics: Customization & Creative Swirls
While the classic **no churn peanut butter Oreo ice cream** is a masterpiece on its own, its inherent simplicity makes it a canvas for endless creativity. This is where your personal flair can truly shine! Don't feel confined to just peanut butter and Oreos – think of them as an incredible starting point.
Here are some ideas to inspire your next batch:
* **Chocolate Lovers' Dream:** For an even deeper chocolate experience, fold in some unsweetened cocoa powder into the base mixture alongside the sweetened condensed milk. This can help balance the sweetness and intensify the chocolate flavor, especially when paired with chocolate-filled Oreos. You could also drizzle in chocolate fudge or ganache.
* **Candy Crushes:** Why stop at Oreos? Introduce other chocolate or peanut butter candies. Reese's Peanut Butter Cups (mini or chopped), Butterfingers, M&M's, or even chopped Snickers bars can add delightful new dimensions of flavor and texture.
* **Nutty Variations:** Experiment with different nut butters like almond butter or cashew butter for a subtle shift in flavor profile. Add chopped roasted peanuts or candied pecans for extra crunch.
* **Cookie Chaos:** Swap out or supplement Oreos with other cookies. Think chocolate chip cookies, Nutter Butters, graham crackers, or even shortbread. Each brings its own unique texture and flavor to the party.
* **Saucy Swirls:** Beyond peanut butter, consider swirling in caramel sauce, hot fudge, or even a berry compote for a surprising twist. Just remember that highly liquid additions should be added judiciously to avoid an overly icy final product.
The key to successful customization is to layer your flavors and textures. Start with your rich, creamy base, then add your main mix-ins, and perhaps finish with a drizzle or sprinkle of something contrasting. This layering not only makes for a more exciting bite but also a visually stunning dessert. For more innovative ideas and inspiration on transforming your simple base into an extraordinary dessert, check out our guide on
Lazy Summer Treat: Customize Your No-Churn PB Oreo Ice Cream. It’s packed with tips for making every batch uniquely yours.
Tips for a Flawless Freezer-Friendly Treat
Achieving that perfect scoop of **no churn peanut butter Oreo ice cream** is surprisingly straightforward, but a few expert tips can elevate your creation from good to absolutely legendary.
* **Start Cold, Stay Cold:** Ensure your heavy cream is very cold before whipping. This helps it whip faster and achieve maximum volume and stability. Some even chill their mixing bowl and whisk attachments for optimal results.
* **Don't Overmix the Base:** Once you've folded in the sweetened condensed milk and your mix-ins, avoid overmixing. You want to combine everything just until incorporated to maintain the airiness of the whipped cream, which is crucial for a smooth texture.
* **The Right Container:** Use a shallow, freezer-safe container with a tight-fitting lid. A loaf pan is often ideal. The shallower the container, the faster your ice cream will freeze through evenly.
* **Patience is a Virtue:** Allow adequate freezing time, typically 6-8 hours, or preferably overnight. Rushing the freezing process can result in a softer, less stable ice cream.
* **Prevent Freezer Burn:** A tight-fitting lid is essential. For extra protection against ice crystals and freezer burn, press a layer of plastic wrap directly onto the surface of the ice cream before sealing the container. This creates an additional barrier against moisture.
* **Serving Perfection:** For the best scoopability, remove your ice cream from the freezer 5-10 minutes before serving. This allows it to soften slightly, making it easier to scoop and enhancing its creamy texture.
* **Balancing Sweetness:** Sweetened condensed milk is, as its name suggests, very sweet. If you're adding extremely sweet mix-ins, consider incorporating a pinch of salt or a splash of unsweetened cocoa powder to the base (as mentioned earlier) to help cut through the richness and enhance other flavors. A good quality vanilla extract also plays a crucial role in rounding out the sweetness.
Storing your homemade ice cream correctly means you can enjoy this delightful treat for up to two weeks, though we doubt it will last that long!
In conclusion, the **no churn peanut butter Oreo ice cream** isn't just a dessert; it's a celebration of ease, flavor, and pure, unadulterated indulgence. It shatters the myth that incredible homemade ice cream requires specialized equipment or extensive culinary skills. With its simple ingredient list, minimal prep, and endless customization possibilities, it's the perfect treat for any occasion – a hot summer day, a spontaneous craving, or a celebratory moment. So go ahead, gather your ingredients, unleash your inner ice cream artist, and prepare to be amazed by how easily you can create a frozen dessert that tastes like it came from a gourmet parlor. Your taste buds (and your busy schedule) will thank you.